- Integrations
- Google Chat by Grux
Keeping everyone moving forward from wherever you are with Google Chat
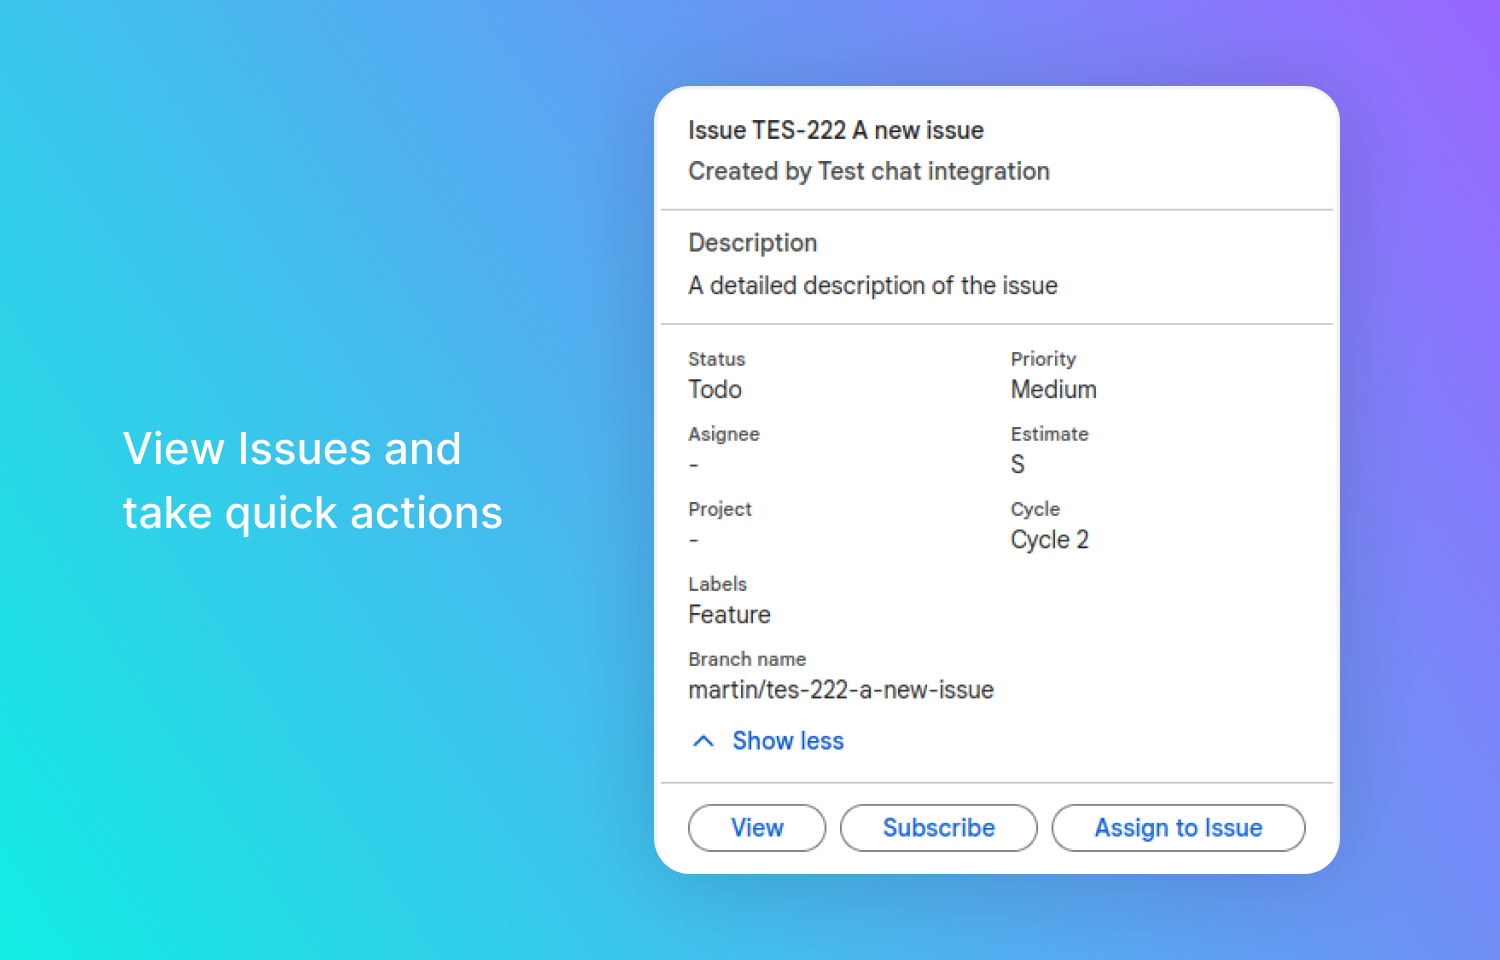
Overview
Grux’s Google Chat integration allows users to get notified and take action on Route5 activity from within the Google Chat interface. Granular notification settings allow each person to get through the noise and see what needs their attention. Take action with updates or leave comments. Breakdown the silo and streamline your Route5 projects, sprints, tasks, issues, and bug workflows.
How it works
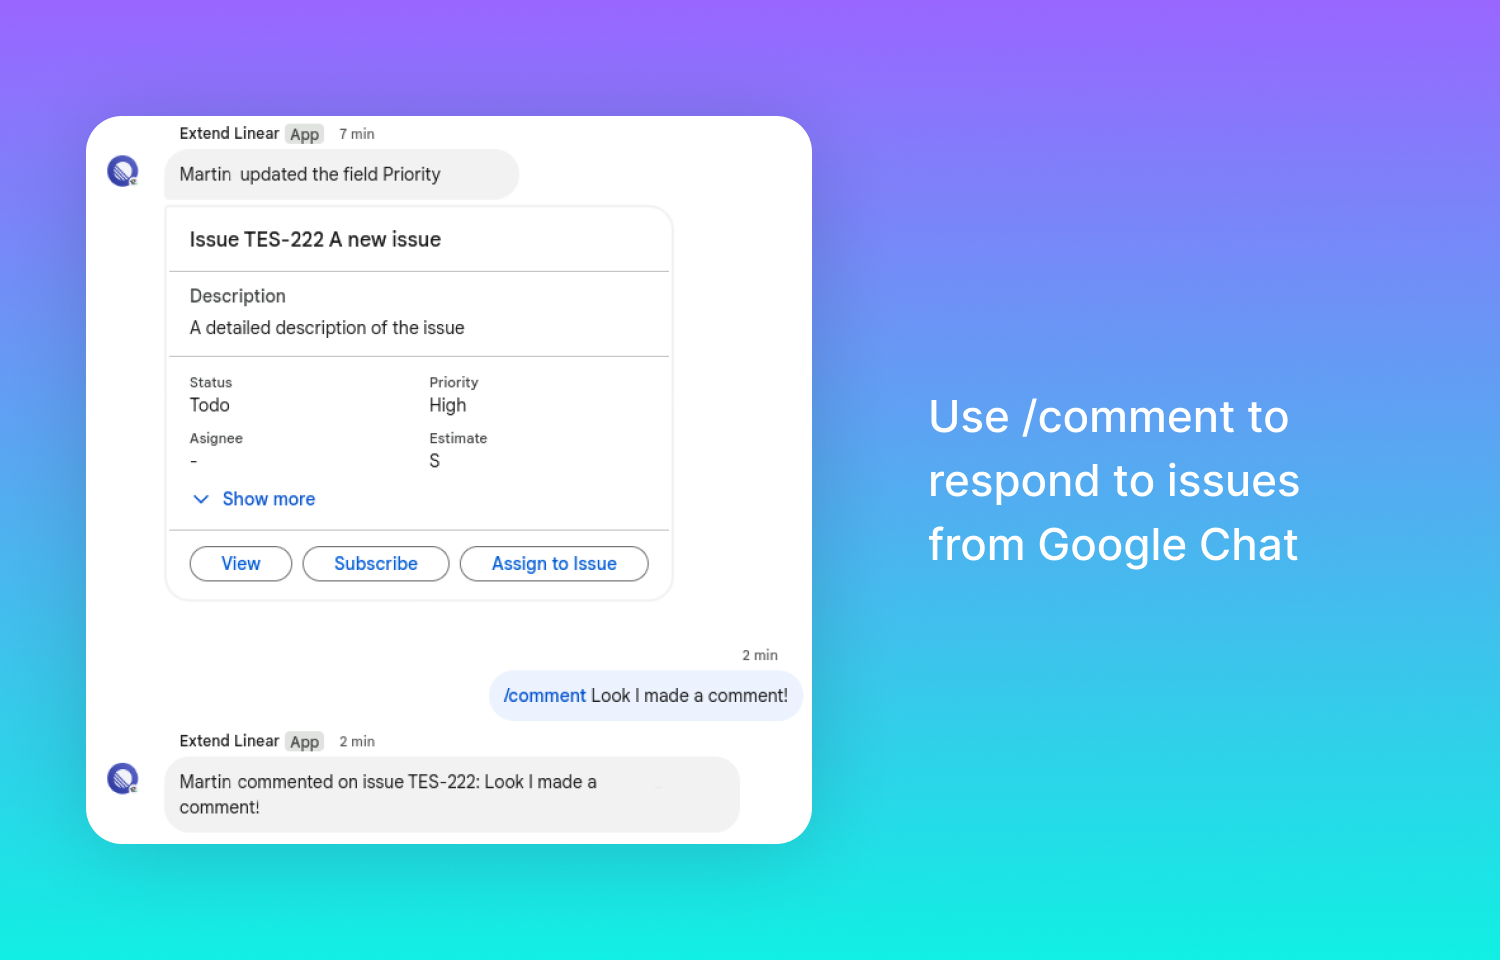
Using slash commands or prompts, users can easily create or update Route5 projects or issues. To initiate one of these workflows, a user may enter the slash command /create or /update respectively. Most fields on a project or issue can be updated from Google Chat. Additional actions such as Assign, Subscribe, and View options are visually represented as buttons. Any changes made in Route5 (within Route5.app) can also be configured for notification in a Google Chat Space or as a Direct Message.
Users can also @mention other users and comment on Route5 issues within the Google Chat Interface (and vice versa) and receive notifications when issues are updated. These features are possible through @mentioning the desired user or commenting (/comment) in the Google Chat thread associated with the Route5 issue.
To prioritize notification types within the Google Chat interface, the user can categorize them into three distinct priority levels: Regular, Important, and Urgent. This approach ensures that users receive relevant updates in a manner that respects their focus and time. Users control this through their settings (/settings). To access support or to report bugs, users can use the help slash command (/help) or navigate in their browsers to https://grux.io/support
Configure
In Google Chat the user must be designated as a ‘Space Manager’. This requirement is only applicable when adding to a Space, if adding Route5 under the Direct Messages section this does not apply.
- Go to Extend Route5 in Marketplace or search Extend Route5 in the “Apps & Integrations” configuration tab of the Space you want to add it.
- Once the App is added to the Space, a Welcome message is shown with instructions on how to configure it.
- The first step is to link the Space to a Route5 organization, for this we use the “/linkToLinear” command and follow the instructions in the Dialog.
- After that, every user that wants to use the app needs to link their account in Google to their account in Route5, for this we use the “/linkUser” command.
Commands available:
/create, /update, /comment, /settings, /help.